
My sourdough instructions
Like many I started making sourdough bread during the pandemic. I built my starter from scratch and spent weeks banging my head against the wall as I tried to make sense of everything I’d read and seen on the internet about how to make the most fundamental of foodstuffs. I was frustrated and I loved it. Eventually I figured it all out, learning lessons such that temperature is massively important and that you should follow your senses not time, and today I bake beautiful loaves. I’ve written a guide that I share with folks who ask, and am putting it here for you.
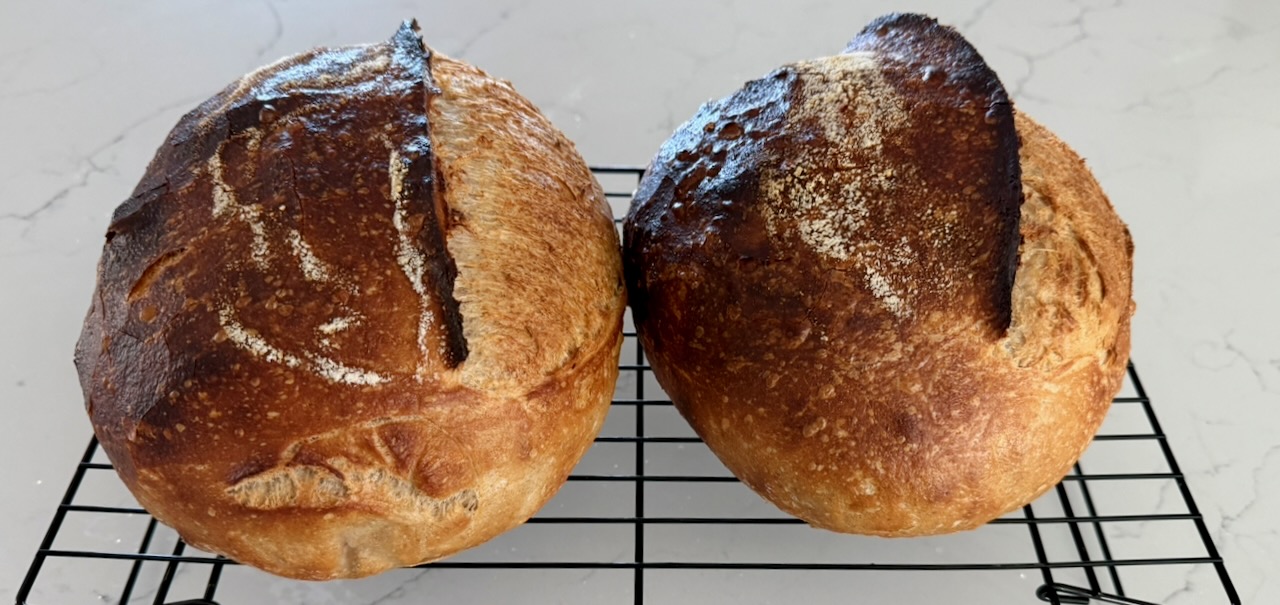
Short, fast version
| Time | Instructions |
|---|---|
| 7PM | Feed your starter. Leave out on the counter overnight. |
| 7AM | Feed your starter again. Put the fed starter in the fridge. Add about 2oz (56g) discarded starter to 2oz water and 2oz flour. Mix. This is your levain, which you’ll use to ferment your dough. Create your dough (autolyse): add 500 grams flour and 350 grams water to a bowl or plastic container. Mix by hand. Cover and let sit. |
| 7:45 AM | Add your levain and 10g salt to your autolyse. Mix by hand. Cover and let sit. |
| 8:30AM | 4 stretch and folds. |
| 9AM | 4 stretch and folds. |
| 9:30AM | 4 stretch and folds. |
| 10AM | 4 stretch and folds. |
| Cover and let sit on the counter until the dough doubles in size. Depending on the temp or your kitchen, this could be 4 hours. Or it could be 12. Watch it. | |
| When doubled | Optional: Pre-shape the dough. Let sit 30 minutes. (I’m not convinced this step does much.) |
| 30 mins later… | Shape the dough into your final loaf. Place in banneton and put into a plastic bag. Put the bagged banneton into the fridge. |
| 12-36 hours later | Pre-heat the oven with your dutch oven in it to 500 degrees. Place your loaf on a piece of parchment paper. Score the loaf. Put the parchment paper with the loaf in the dutch oven. Cover. Bake for 30 minutes. Reduce the temp to 475. Remove the lid, and bake until desired brownness. Cool and eat. |
Long version
Starter
Keep your starter in the fridge when not planning to bake. For optimal starter health, feed it weekly. However, waiting 2 or even 3 weeks between feeds won’t kill the starter, so don’t get crazy about it.
Feeding the starter
To feed the starter you’ll use a 1:1:1 ratio: 1 part old starter, 1 part water, 1 part flour. I use 4 oz each (4 oz starter, 4 oz water, 4 oz flour). Precise instructions:
- Pull the starter out of the fridge
- Put a clean, empty jar on the scale, and zero out the weight
- Add 4 oz of your old starter to the jar
- Add 4 oz of purified water to the starter in the new jar
- Stir up the starter/water mixture with a chopstick
- Add 4 oz of flour to the starter/water mix in the new jar. I find the the starter does well with 2 oz of rye or whole wheat, and 2 oz of all-purpose. Mix the flour in with the chopstick.
- You should now have 12 oz total in the new jar
- Seal the jar with a tight lid.
- If you plan to make dough and bake that day or next, let the starter sit out on the counter until it more than doubles.
- If you don’t plan to make dough—if you’re simply feeding the starter to keep it healthy—let it sit out for an hour or two, then put it in the fridge.
- Discard the extra old starter. Or make pancakes or a discard loaf or whatever.
Making your dough
To make dough, you first need to make your levain. Levain is the French word for starter, and is simply a small portion of starter that you set aside for the purposes of creating your dough. The levain is sometimes called a pre-ferment because it’s added to your flour and water when it’s fully fermented, and the yeast are awake and hungry to eat more.
Before you make the levain, though, you want to make sure your starter is freshly fed; you don’t want to pull a dormant starter from the fridge to create your levain. My method for this:
- The night before—around 7PM or so—feed the starter. Discard the extra starter. Leave the freshly fed starter on the counter overnight.
- The next morning—around 7AM or so—feed the starter again.
- You should have lots of starter left over from this morning’s feed. This time, instead of discarding the extra, you’ll use it to make your levain.
- Leave the freshly fed starter on the counter (after an hour or two, refrigerate it).
- Take a portion of the extra starter and feed it. The portion you use is dependent on how much bread you plan to make. My general rule of thumb is to use about 20% of the weight of your flour—though often I cheat and just all or most of the leftover starter after the refeed into my dough.
This is a good place to stop and cover baker’s percentages and the ingredients you’ll need for your bread.
Baker’s percentages
Baker’s percentages are an easy way to discuss the relative proportion of ingredients you put into your dough. The percentages are expressed in weight (grams). And they are relative to the overall weight of the flour in your bread. For example, a common loaf I make:
| Ingredient | Weight | Baker’s percentage |
|---|---|---|
| Bread flour | 400 grams | - |
| Whole wheat flour | 100 grams | - |
| TOTAL FLOUR | 500 grams | 100% |
| Water | 350 grams | 70% |
| Levain (starter) | 100 grams | 20% |
| Salt | 10 grams | 2% |
In this example, the total weight of the two flours (bread and whole wheat) is 500 grams. In baker’s terms, the weight of the flour is always 100% no matter the amount of flour used. Flour is the frame of reference for all other ingredients. Water is 350 grams, or 70% of the total weight of the flour. Water is sometimes referred to as your hydration level. Levain is 100 grams, or 20% of the total weight of the flour. And salt is 10 grams. You get the point.
You can adjust any of these to experiment with different outcomes. For example, you might desire a bread with bigger holes, so you might try 75% or 80%, which can yield more elasticity in the gluten. Some folks like their bread a tad bit saltier, so bump salt up to 3%. Some like darker, denser bread, so add other flours at higher proportions. Etc.
400-500 grams produces a pretty good sized loaf. I like the easy math of 500g. Start there.
Back to making dough.
- OK, you’re feeding a bit of your leftover starter to create the levain, which ultimately you’ll add to your flour and water. I find it’s easiest to make my levain with the same ratio as my starter—1:1:1, but with lower volumes. For example, if I’m using 400 grams of flour in my dough, since I’ll shoot to add 80 grams of levain to the dough, I’ll create the levain with 27 grams of starter, 27 grams of water, and 27 grams of flour. You can use other percentages to create your levain in order to get different flavors and fermentation speeds. But start here.
- After you’ve mixed your levain, let it ferment on the counter until it’s doubled in size. Another way to check is if a bit of it floats in water (the “float test”). In my 69-degree kitchen, that’s usually 6 hours or so.
- OK, an aside. I don’t always create a separate levain. Sometimes I find my starter from the previous night is super strong. So after I feed my starter and put my jar in the fridge, I’ll just use the discard for my daily bread. It saves me 3-4 hours, and the bread is just as good. So there’s the right way, and there are ways that also work. You decide.
- Back to the right way. About an hour before you think the levain is done, mix your flour and water together in the container where your dough will sit for the next many hours. Cover it with something airtight, and let it sit on the counter. I mix by hand, as it’s fast and easy, and the time to clean the mess off my hand is still less than a mixer. This flour/water mixture is called an autolyse. The purpose of the autolyse is simply to get the gluten formation going early, which helps with an open crumb.
- Once your starter floats (or is more than doubled), add it to the top of the autolyse. Add your salt. Then mix it all together by hand. I pinch it a bunch until it seems like everything is thoroughly mixed in. Cover.
- Wait 30 mins. Then do your first set of stretch-and-folds. Stretching and folding the dough is how you’ll build gluten. You’ll do this in place of kneading. Basically, grab an edge of the dough, pull it to stretch it (without tearing it), and fold it over the rest of the dough. Do a quarter turn, and stretch and fold it again. Then do this 2 more times, for a total of 4 stretch-and-folds. Do a few more if your feel your stretches weren’t at full stretchiness. Cover.
- Wait 30 mins. Do 4 more stretch-and-folds. Cover.
- Wait 30 mins. Do 4 more stretch-and-folds. Cover.
- Wait 30 mins. Do 4 more stretch-and-folds. (This should be set #4 of stretch-and-folds.) Cover.
- That’s it! Now all you do is keep the dough covered, and let it rise until it’s doubled in size.
Shaping your loaf
Once your dough has doubled-ish, it’s time to shape your loaf. There are two steps to this: first, a pre-shape, and then a final shape.
- Flour the countertop. Ease the dough out of its bowl or tub onto the floured countertop. Try not to tear the dough as you do this.
- Flour your hands, and roughly shape the edges of the dough into a ball. Do so by applying tension to the top of the dough and pulling down to push the edges of the dough underneath the loaf. This is called the pre-shape, and will help the dough have a nice final form in the end. Or so they say. I sometimes skip this step, too.
- Cover the dough with a bowl for 30 minutes or so. This is called the bench rest. Also a step I sometimes skip.
- While your dough is resting, get your banneton out. Flour it—ideally with rice flour (the best to prevent sticking). If no rice flour, use all-purpose, and flour the banneton liberally.
- Now it’s time for the final shape. Uncover the loaf. Gently stretch the dough to flatten it out.
- Grab the left and right sides. Pull them gently, then fold them each in on the loaf. You want one side to overlap the other. For example, fold the right side halfway over the loaf. Then fold the left side over the right side.
- Grab the top of the loaf with both hands, and roll the dough up toward you. This is like rolling up a sleeping bag. Try to create tension in the top of the loaf. The tension is the key.
- Gently rock the loaf in a circular fashion to coak a spherical shape out of the dough. Try to continue and create tension in the top of the loaf.
- When you have a nice spherical shape, take your bench knife, and shove it under the loaf. Pick up the loaf with the bench knife, and flip it over into the banneton.
- Pinch any open seams on the bottom of the dough to help it retain its shape.
- Put the banneton in a plastic grocery bag, and tie or clip the end.
- Put the banneton in the refrigerator. You’ll bake the next day.
The bake
- Pull out your dutch oven. Place it in the oven.
- Pre-heat the oven to 500 degrees.
- Once the oven hits 500, pull the banneton out of the fridge.
- Cut a piece of parchment paper roughly the size of the bottom of your dutch oven.
- Flip the loaf out of the banneton onto the parchment paper.
- Pull the dutch oven out of the oven.
- Place the loaf into the dutch oven.
- Score the loaf. A knife works. One slash at an angle just off center. This gives the steam a place to escape.
- Put the lid back on the dutch oven, and put it back in the oven.
- Cook for 30 minutes.
- Take the lid off the dutch oven, and lower the heat to 475.
- Cook for another 10-20 minutes–depending on how brown (or blonde) you want your loaf. I always go a little longer, because I like mine brown.
- When done, pull the dutch oven out of the oven. Pull the loaf out and put on a cooling rack.
- Eat with butter and salt.
:)
Variations
- You can add mix-ins (like seeds, grains, herbs) when you add the levain to your autolyse. Just fold them in with your levain and salt, and let them ferment along with the flour.
- You can coat your loaf in whatever–oats, sesame seeds, poppy seeds, everything bagel spice. To do so, just spritz your loaf with a bit of water right before you put it in the oven, and roll it in seasoning. Or sprinkle the seasoning on top, and use your hand to pat it into place.